

Mood Cloud
A cloud knows the mood of this crowd
Concept
People use social media to express things or emotions in their life. However, when your sharings are indicating to yourself, it’s hard to not think twice about what others might feel or think about you after seeing those. In a society that honors positive personalities, people tend to share their negative feelings less. Without having a way to simply just say “I am not happy“ can lead to chronological mental illness.
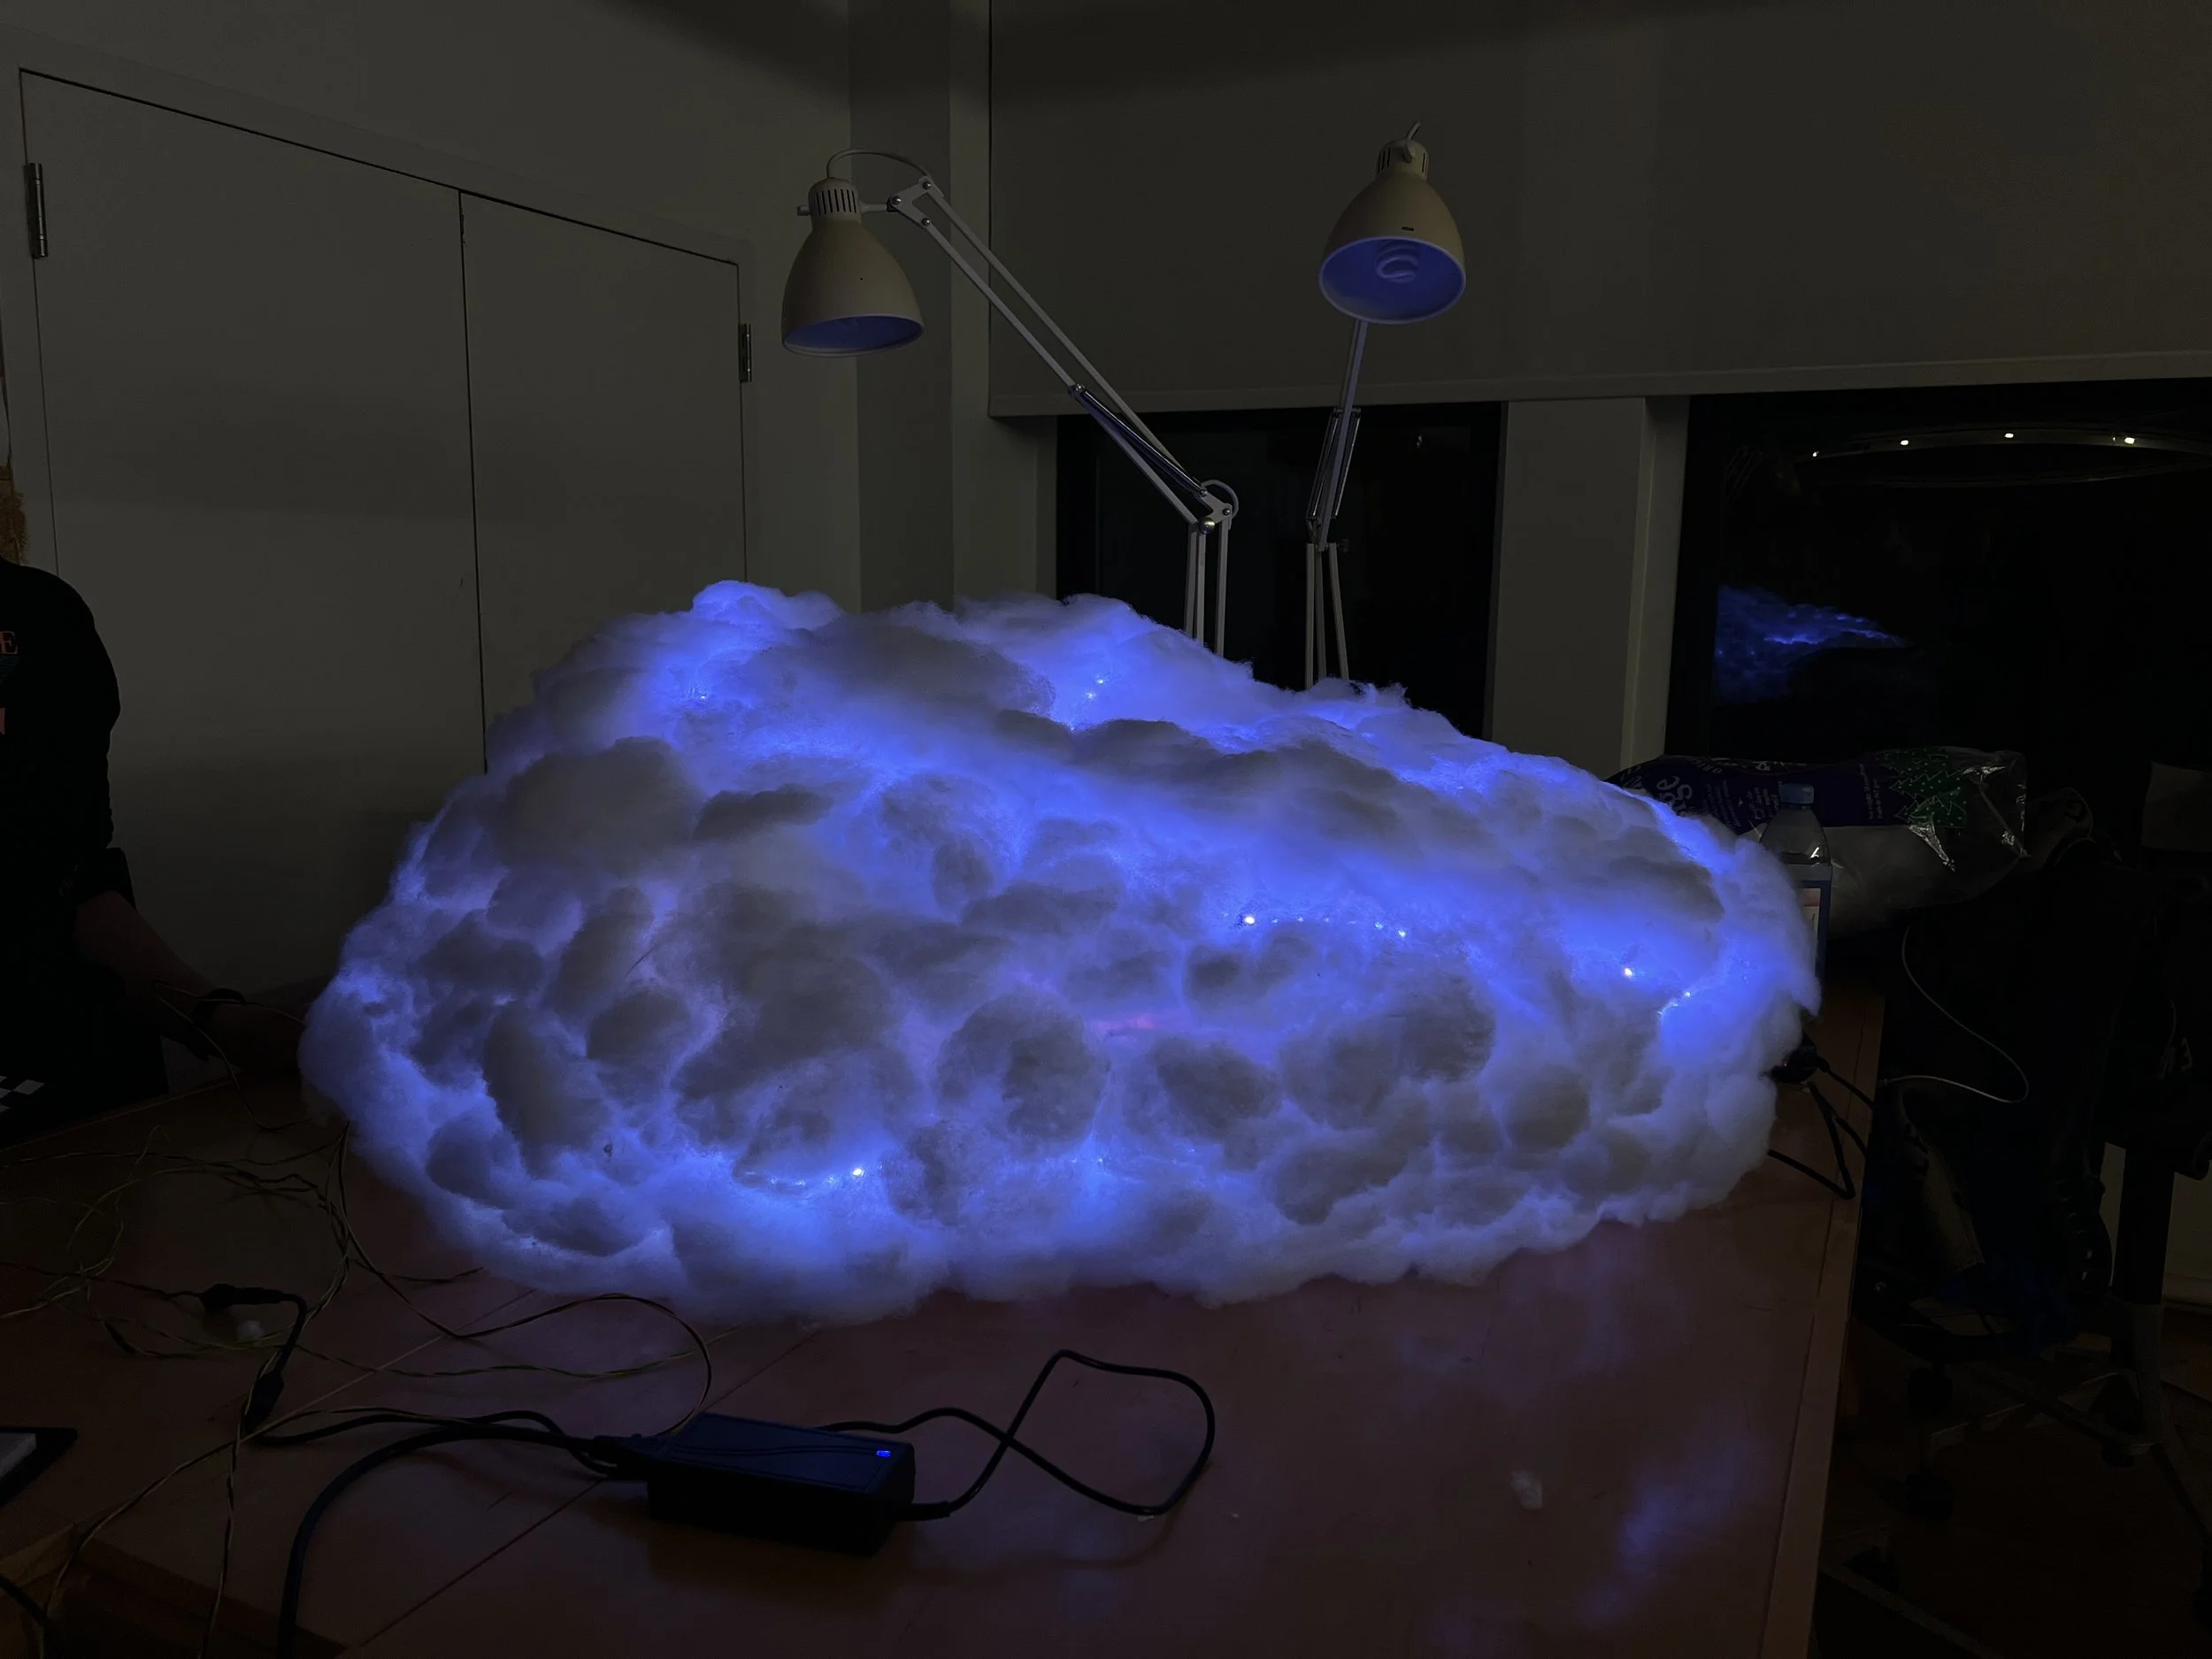
As a result, we created this mood cloud that can help people express their emotions through the cloud without being known how good or bad they feel and still can know the average mood in a space. As a result, people in the space can care about others more if the cloud shows more negative colors or can be more comfortable while seeing more color representing happiness.
How We Built This
Interaction
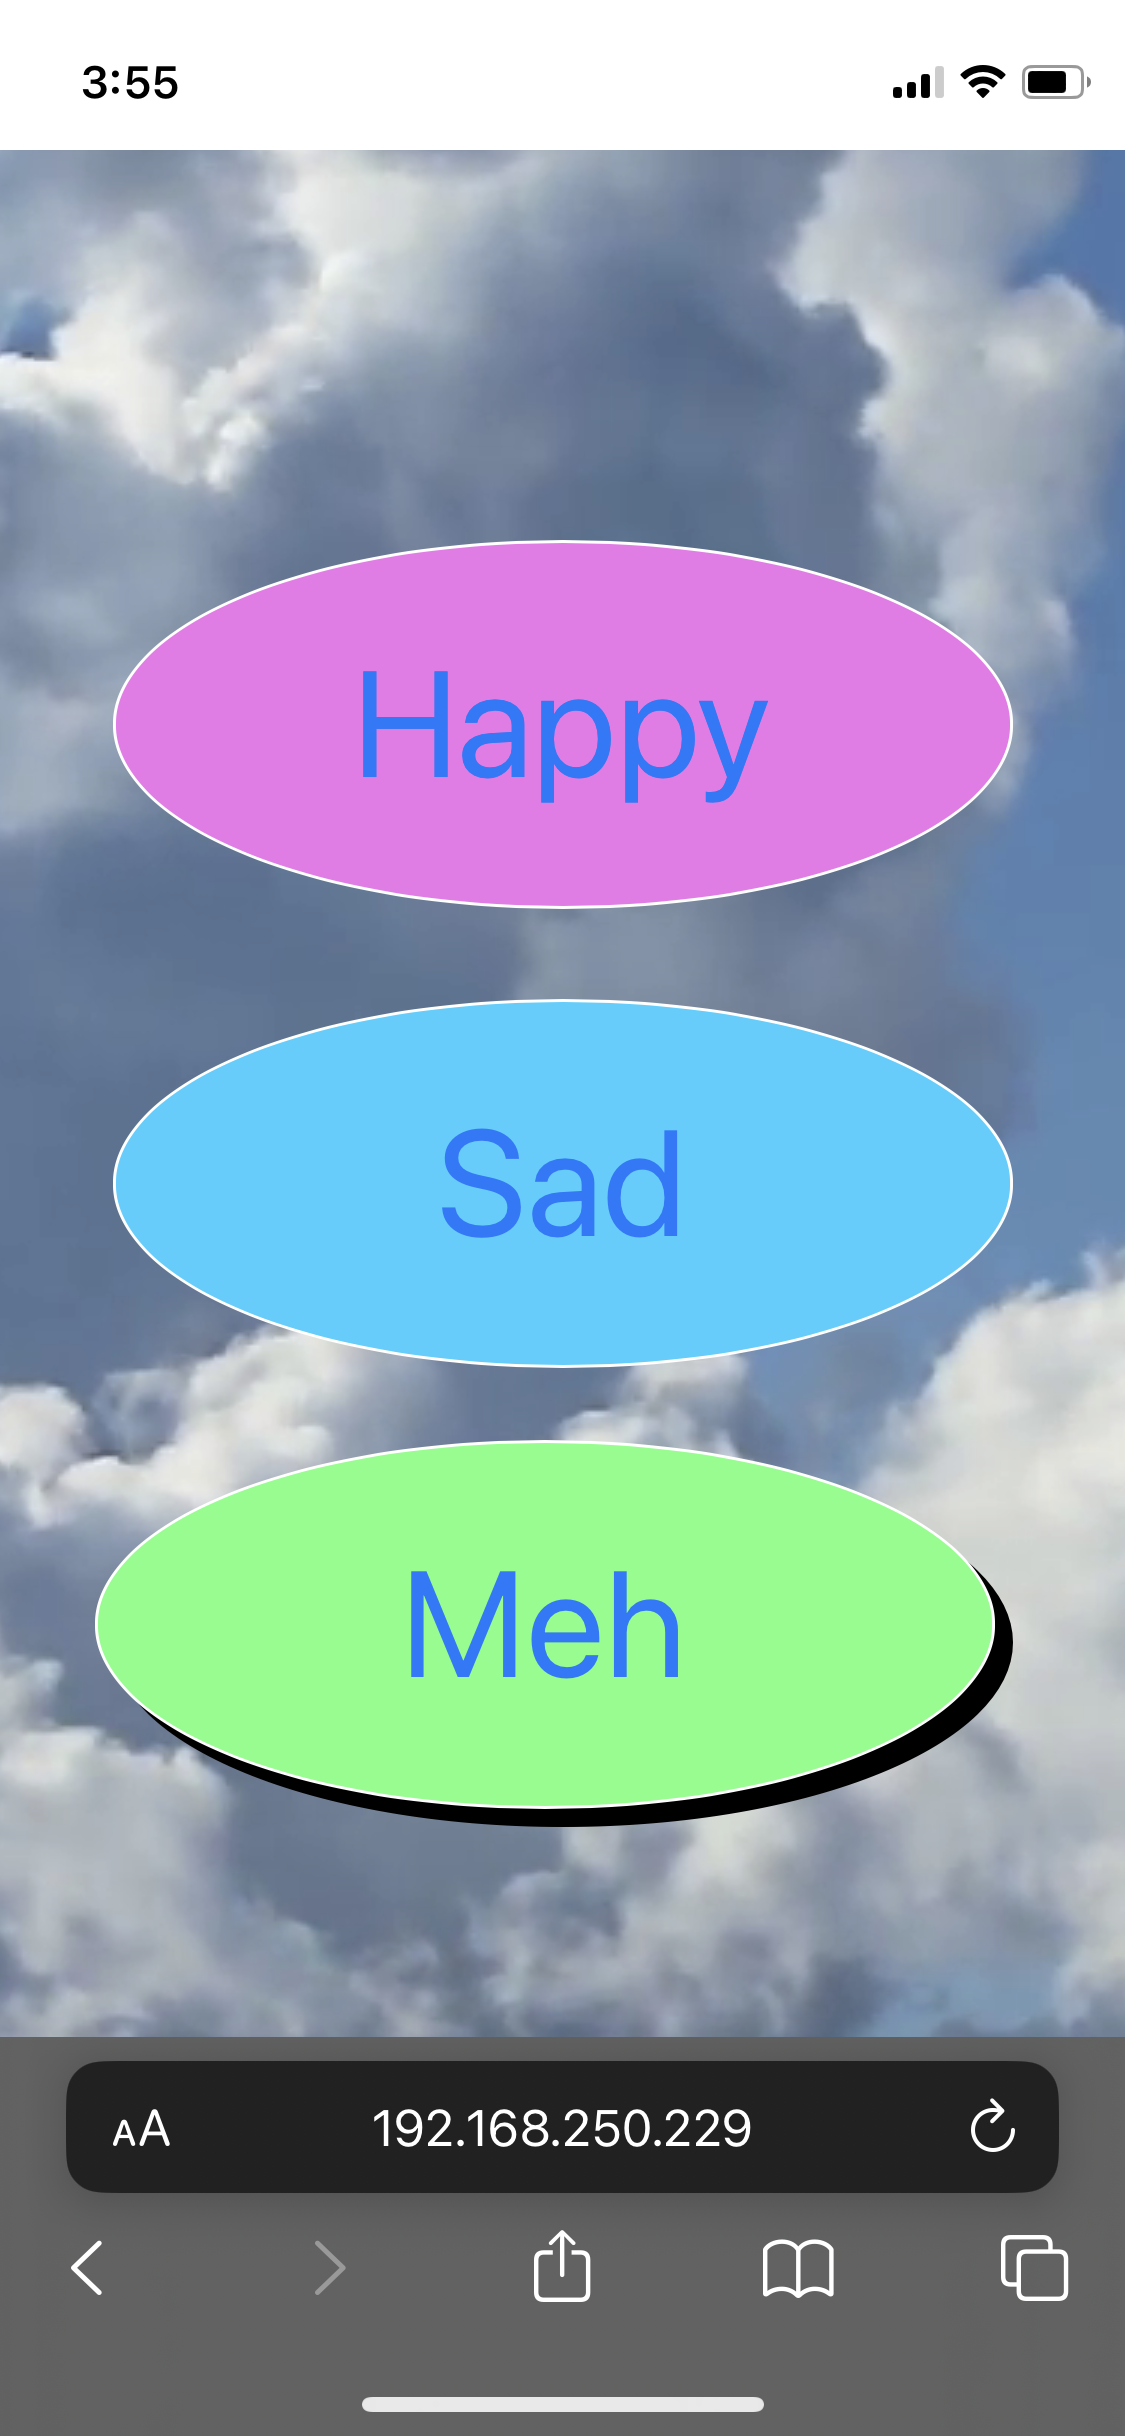
People scan the QR code to open the app on their phones. They can select the mood they have and the color will upload to the cloud.
We use MQTT to let multiple devices communicate with the cloud at the same time and being able to update the colors based on each message that the cloud receives.
Button and colors
When people feel happy, click the button “happy“ and it will send colorful and warm colors to the cloud.
When people feel soso, click the button “Meh“ and it will send plain white to the cloud.
When people are sad, click the button “sad“ and it will send cold and blue colors to the cloud.
Team
My Role: Coder
Develop code for the microcontroller and main interaction, build MQTT environment with MQTTX and Arduino IDE, and mix LED effects code into the main code.
Teammates
Ju Eun Jeon: Design P5 app, and graphic for the poster
Harshi Rambhia: LED effects code and design
Sukyong(Jade) Kwon: the all fabrication
Mateirals
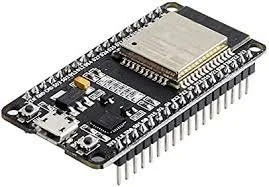
Microcontroller: ESP32
Software: Arduino IDE, MQTTX, Visual Studio Code, P5.js, Arduino IDE
Languages: C++, Javascript
Other materials: LED Strips, jumper wires, transistors, power supply, resistors, breadboard, Cotton, metal strips, wood stick, strings, and us!
Draft

Circuit


Process
Stage 1
Let one LED blinks though controlling by P5 app.
Stage 2
Control 1 LED with multiple devices
Stage 3
Switch 1 LED to the 1st LED of an LED strip.
Stage 4
LED effects
P5 app
Fabrication
Prototype
Build the cloud + Test the light with cotton


Install the LED strips


Final Test
Final Outcome
Gaphic Design and P5 app

Conclusion
It is my first time using ESP32 as the main microcontroller, and my first time using building interaction using MQTT. Here are the main things I learned:
The pin number of ESP32 is way more complicated. Should double-check each time.
The power supply and resisters in this circuit dominated the correct color and effects of the LED strips. If something went wrong, check the circuit. If the circuit is fine, then maybe the power supply isn’t enough.
I meet so many issues while coding and even onboarding ESP32 to Arduino IDE. I feel thankful that there are many people sharing their experiences and discussions online so I can debug and find solutions.
Special thanks to our patient and excellent professors, Bruno and Carrie. Without their help, we were not able to do it.